Pull Compensation
Continuing our ‘Digitizing 101’ theme, we’ll cover the most basic and yet most troublesome concept for budding digitizers – distortion. There is a fairly constant amount of distortion that occurs during the stitching process due to the physical interactions between the stitches and the chosen ground. This ever-present distortion means that what you see on-screen is never exactly represented in your final embroidery. This distortion warps shapes, makes outlines miss their marks, and forces elements that seem aligned end up as jagged as a city skyline. There are two main types of distortion that cause our consternation; we’ll cal them Pull and Push. In Part 1, we’ll describe Pull Distortion and ways to combat it, leaving our discussion of Push Distortion for Part 2.

Measurements Matter
Since we’re talking technically, let’s start with a brief message about measurements. You’ll notice that I use metrics for most discussion about digitizing and embroidery. This isn’t only personal preference; metrics and machine embroidery are intertwined. Density (a measurement of the spacing between lines of stitching) is most often measured in millimeters or embroidery points, a unit that represents a distance of .1mm.
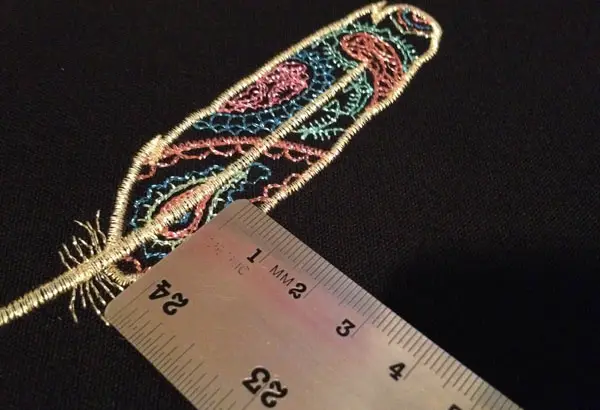
Metrics make so much sense because standard (40wt.) embroidery thread has a thickness of roughly .4mm, meaning an area where lines of stitching are .4mm apart (or 4 points) is completely covered. This forms a constant frame of reference for all of our digitizing settings. You don’t have to use the metric system, but I sincerely believe that it provides the easiest, most direct way to get your head around the measurements needed for digitizing, so I sincerely recommend that folks in countries (as mine) still standing by Imperial measurements learn the ‘other’ side of the ruler. With that out of the way, let’s tackle our first type of distortion – Pull.
Pull Distortion
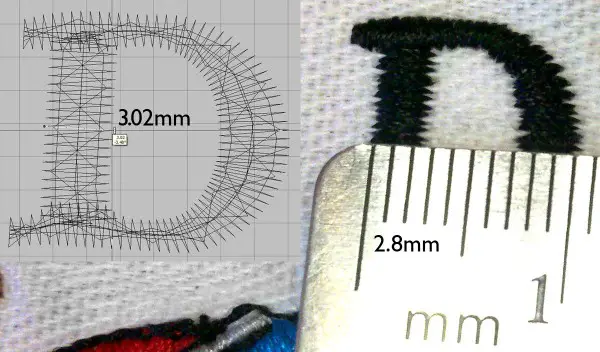
Pull Distortion happens in every stitch- as the stitch is formed and pulls tight, it slightly shortens along its length and draws tight the material inside. This doesn’t require much in the way of examples to explain- the stitch pulls in a bit like a drawstring. This means that a column of satin stitches, like the back stroke of the capital letter ‘D’ shown below, will be narrower stitched than it appears on-screen.
This distortion can vary greatly with the stability and thickness of the material you are embroidering, the tension of your thread, and even the stability of your backing material, but on fairly stable materials you’ll likely see a satin column thinning somewhere between .17mm and .25mm.
Pull Compensation
How do we combat Pull Distortion? We apply Pull Compensation, either through settings in our digitizing software or through manual adjustment. In plain language, we make the column wider. Though it may look overly wide on screen, even to the point of making it seem to far overshoot neighboring outlines, the proper compensation will let the column pull right into place when stitched.
A straight line of text shows this compensation readily. Take the example of a satin-stitched letter ‘L’. We know that the strokes of the ‘L’ will get thinner as they run. If we compensate, or make the strokes wider than the target width by the right amount, the bottom of the ‘L’ will look lower on-screen than the intended baseline of the lettering. When stitched, however, the column will ‘pull’ into line with the rest of the characters- though it looks massively uneven on-screen, a properly compensated line of text is properly aligned when stitched.
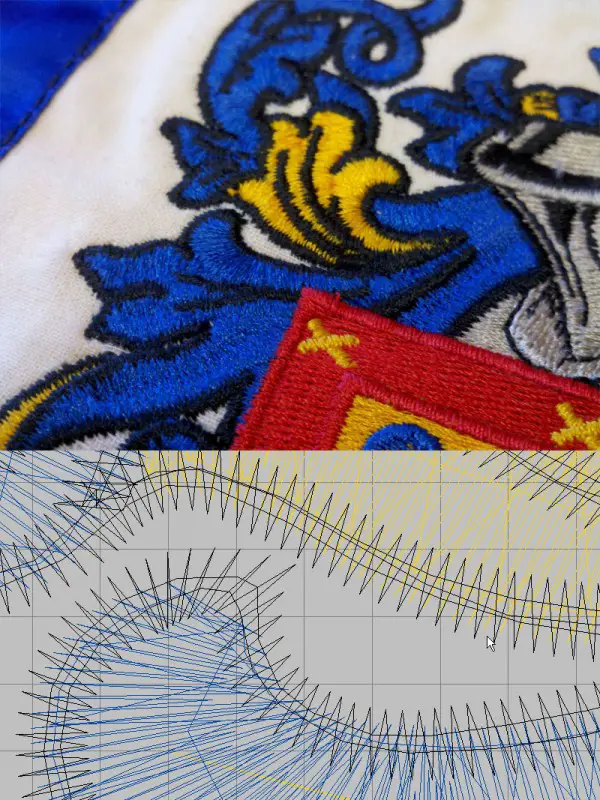
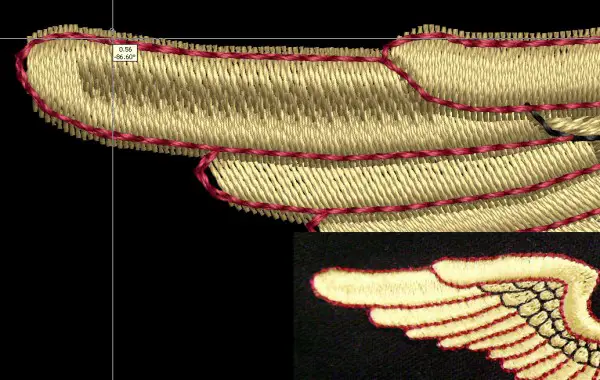
Once you understand Pull Distortion, the reason for many a bad result in your machine embroidery becomes obvious. A related problem had by novice digitizers is poor registration when outlining. If a gap forms between a satin-stitched outline and the element which it surrounds, you know that it has ‘pulled’ out of register. Apply compensation and overlap the items further, even if they look out of whack or overcompensated on-screen, and they’ll fall into place.
Depending on the stability of your material, some elements will be overlapped almost 100% with the width of their borders, as seen in the heraldic mantling above. In this, measurement will be your friend- if you see a half millimeter of gap in your initial sample, you know you need at least that much compensation. Remember, Pull affects fill stitch areas as well as satin stitch columns. Pull and push can even distort shapes, something we’ll cover in Part 2.
Though we’ve embarked a very technical topic, the underlying lesson needn’t be measured only in millimeters. The problem many new digitizers have with distortion is that creating an on-screen design that looks so ‘off’ feels wrong. The kind of people who want to spend their time digitizing intricate designs likely have a strong sense of balance and symmetry and more than a few are probably plagued with perfectionism; I know I am. The trick is to begin with an understanding that the file is not your final creation. If we use that understanding to accept and learn to work with, rather than against, the natural tendencies of our media, we’ll reduce our frustration and increase our freedom to create our best machine embroidery.


