
Hello again to all my marvelous stitchers out there! So here we are in the beginning of the fall season so grab a nice warm mug of hot chocolate, apple cider or chai tea and let’s visit a bit about vertical band samplers shall we.
VERTICAL BAND SAMPLERS
Traditionally, of course, band samplers is horizontal but they certainly don’t have to be that direction. Going vertical means you have to take into consideration the width of your fabric more so than the length. These are oh so perfect for those wider and narrower spaces you want to fill with your creations, not only on walls but also as pillows if you choose. Lengthening the sampler is as easy as just adding additional rows to the column length. How flexible is that?! Now the very lovely thing about these band samplers is you can add as much or as little to them according to your preference. If you love beads and/or crystals, stitch them on. If you want to tell a story, celebrate a birthday, a holiday, a cause, you can do it with your own version of a vertical band sampler.
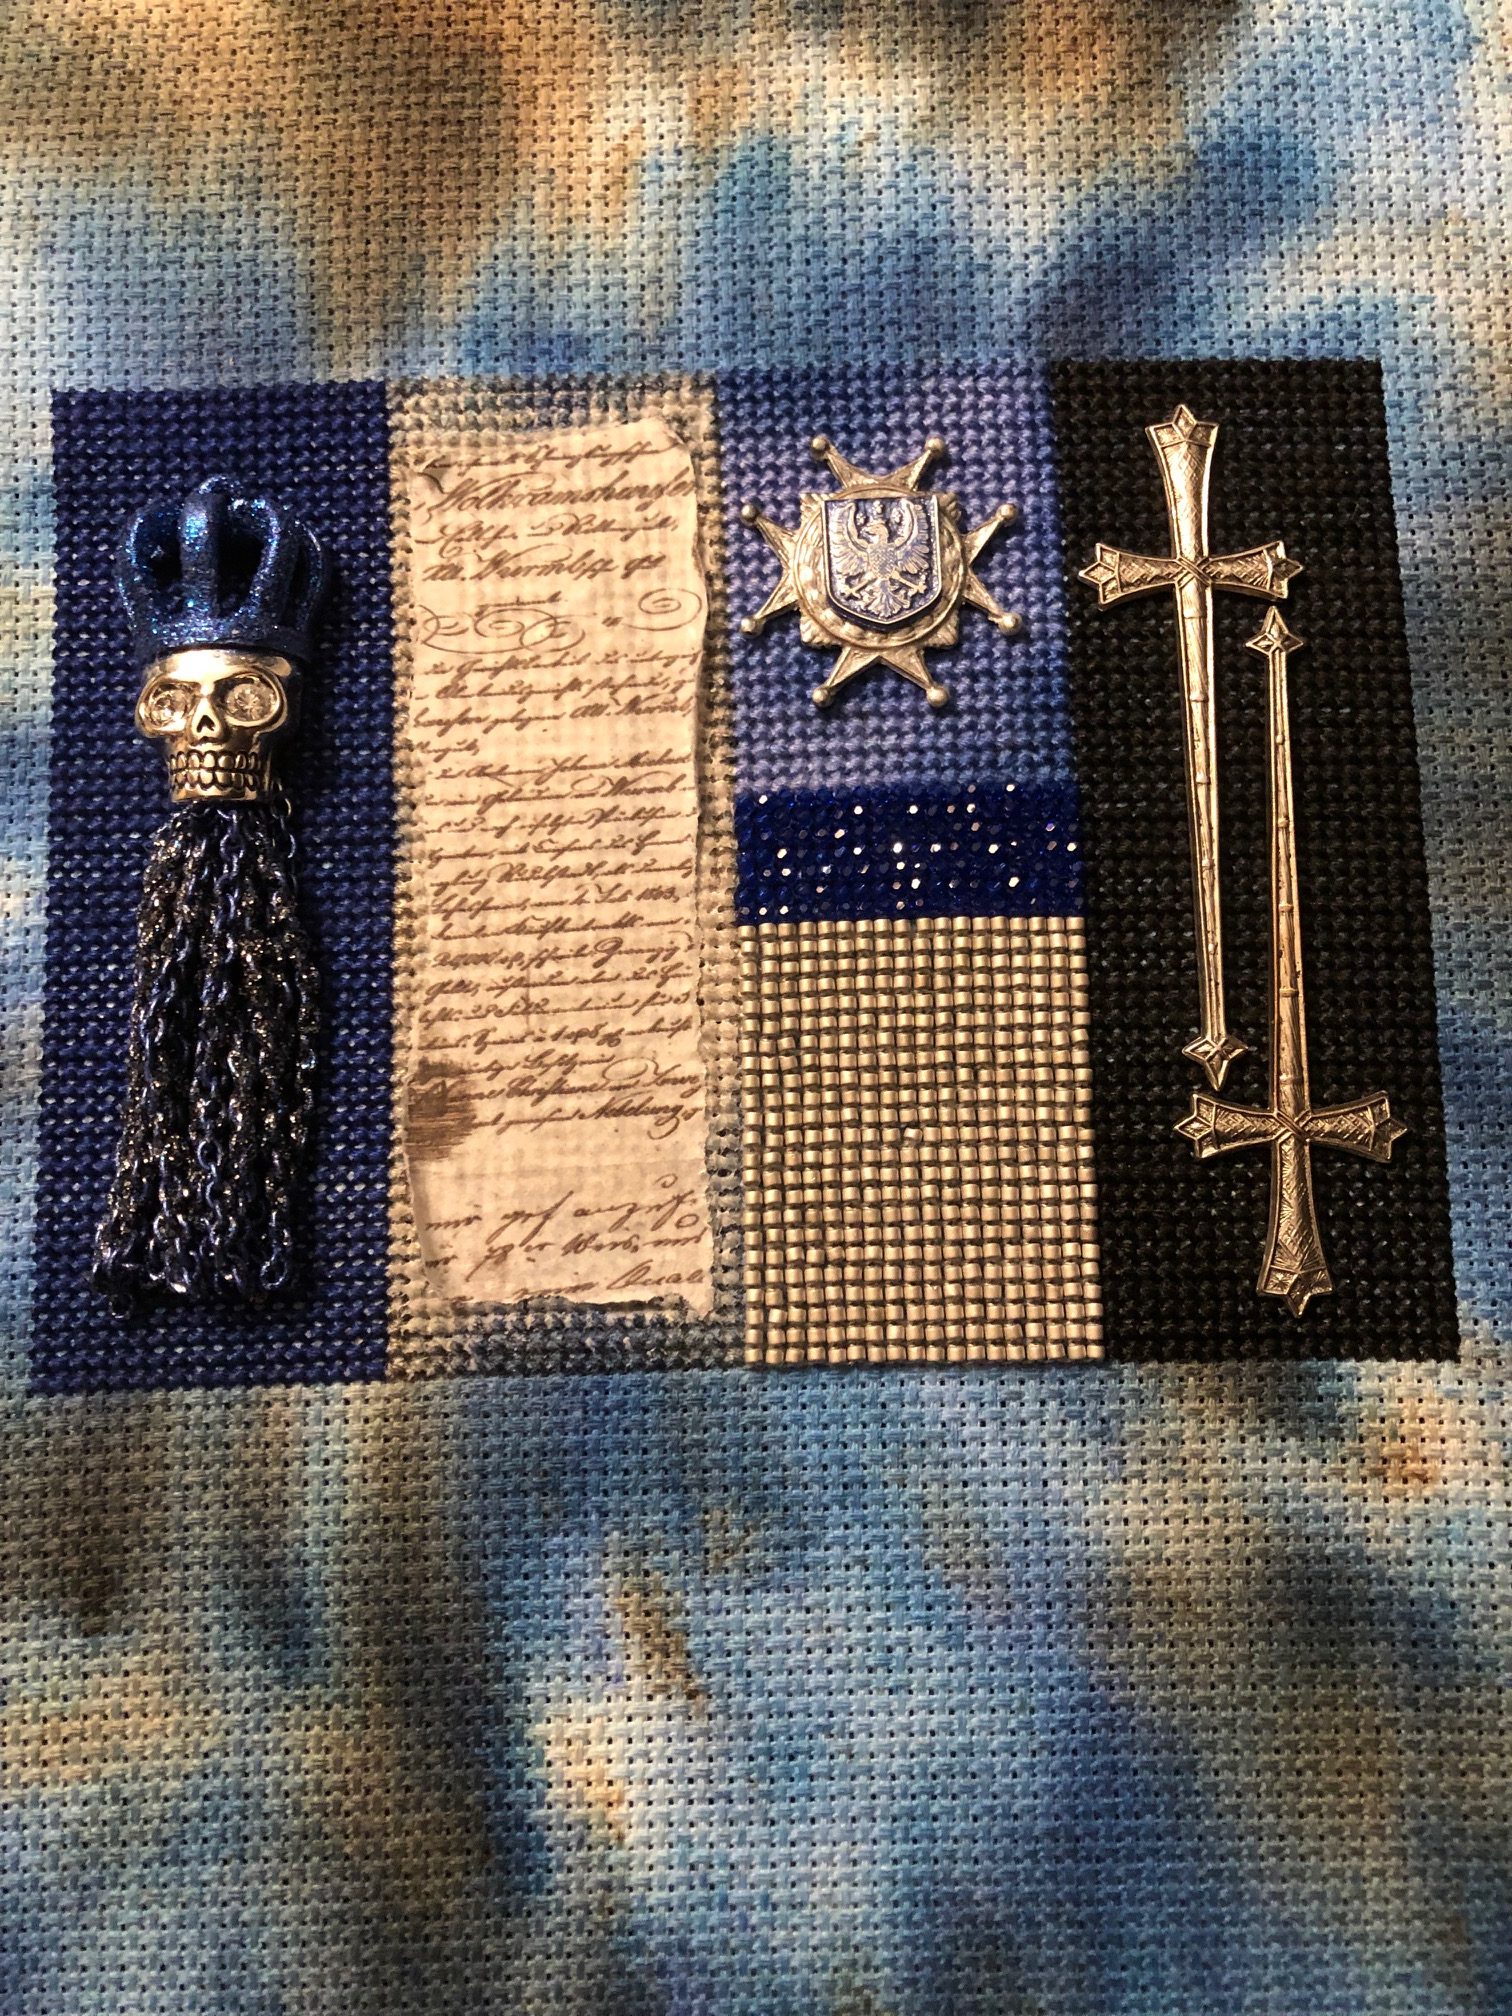
Since we did a pastel version with the horizontal band sampler, I wanted to do something different with the vertical one, a bit darker that could tell a story. The main color I wanted to work was the cobalt blue. I then matched the other colors of floss to it, limiting myself to four colors and four columns. The background on the Aida cloth I sprinkled with PaperArtsy Infusions in Royal Blood. I sprayed it with water lightly initially but then gave it a good soaking after I had three of the columns stitched. This allowed the Infusions to bleed onto some of the stitching which is what I wanted it to do, giving it a hint of aging. I had a fabulous MT Washi Tape with handwriting that I added with clear gesso and an adhesive after I tore it to fit giving it the jagged appearance. In the meantime, I was scoping out metal stampings to go on it that were the right size and had the same vibe. There are a ton available on Etsy and the Internet in general. I did paint some of them with Aladine Izink Diamond Paint and/or Viva Decor Inka Gold. (For information on stitching beads go to my previous column at Sample A Spring Sampler With Seed Beads.)
You can also add charms, for sports, hobbies, occupations, etc.. Choose team colors, favorite colors, décor matching colors, whatever colors you want! Do you like buttons, slap some of those on it too! This is your own project so personalize it the way you want. The skies the limit and your creativity is right up there too!